Home Resources Product tour

A guided tour of Cadrix, in six steps

From a blank canvas to a governed, running workflow. Every screen here is the real product.

6 stepsAbout 3 minutes

Step 1: Build it on the canvas

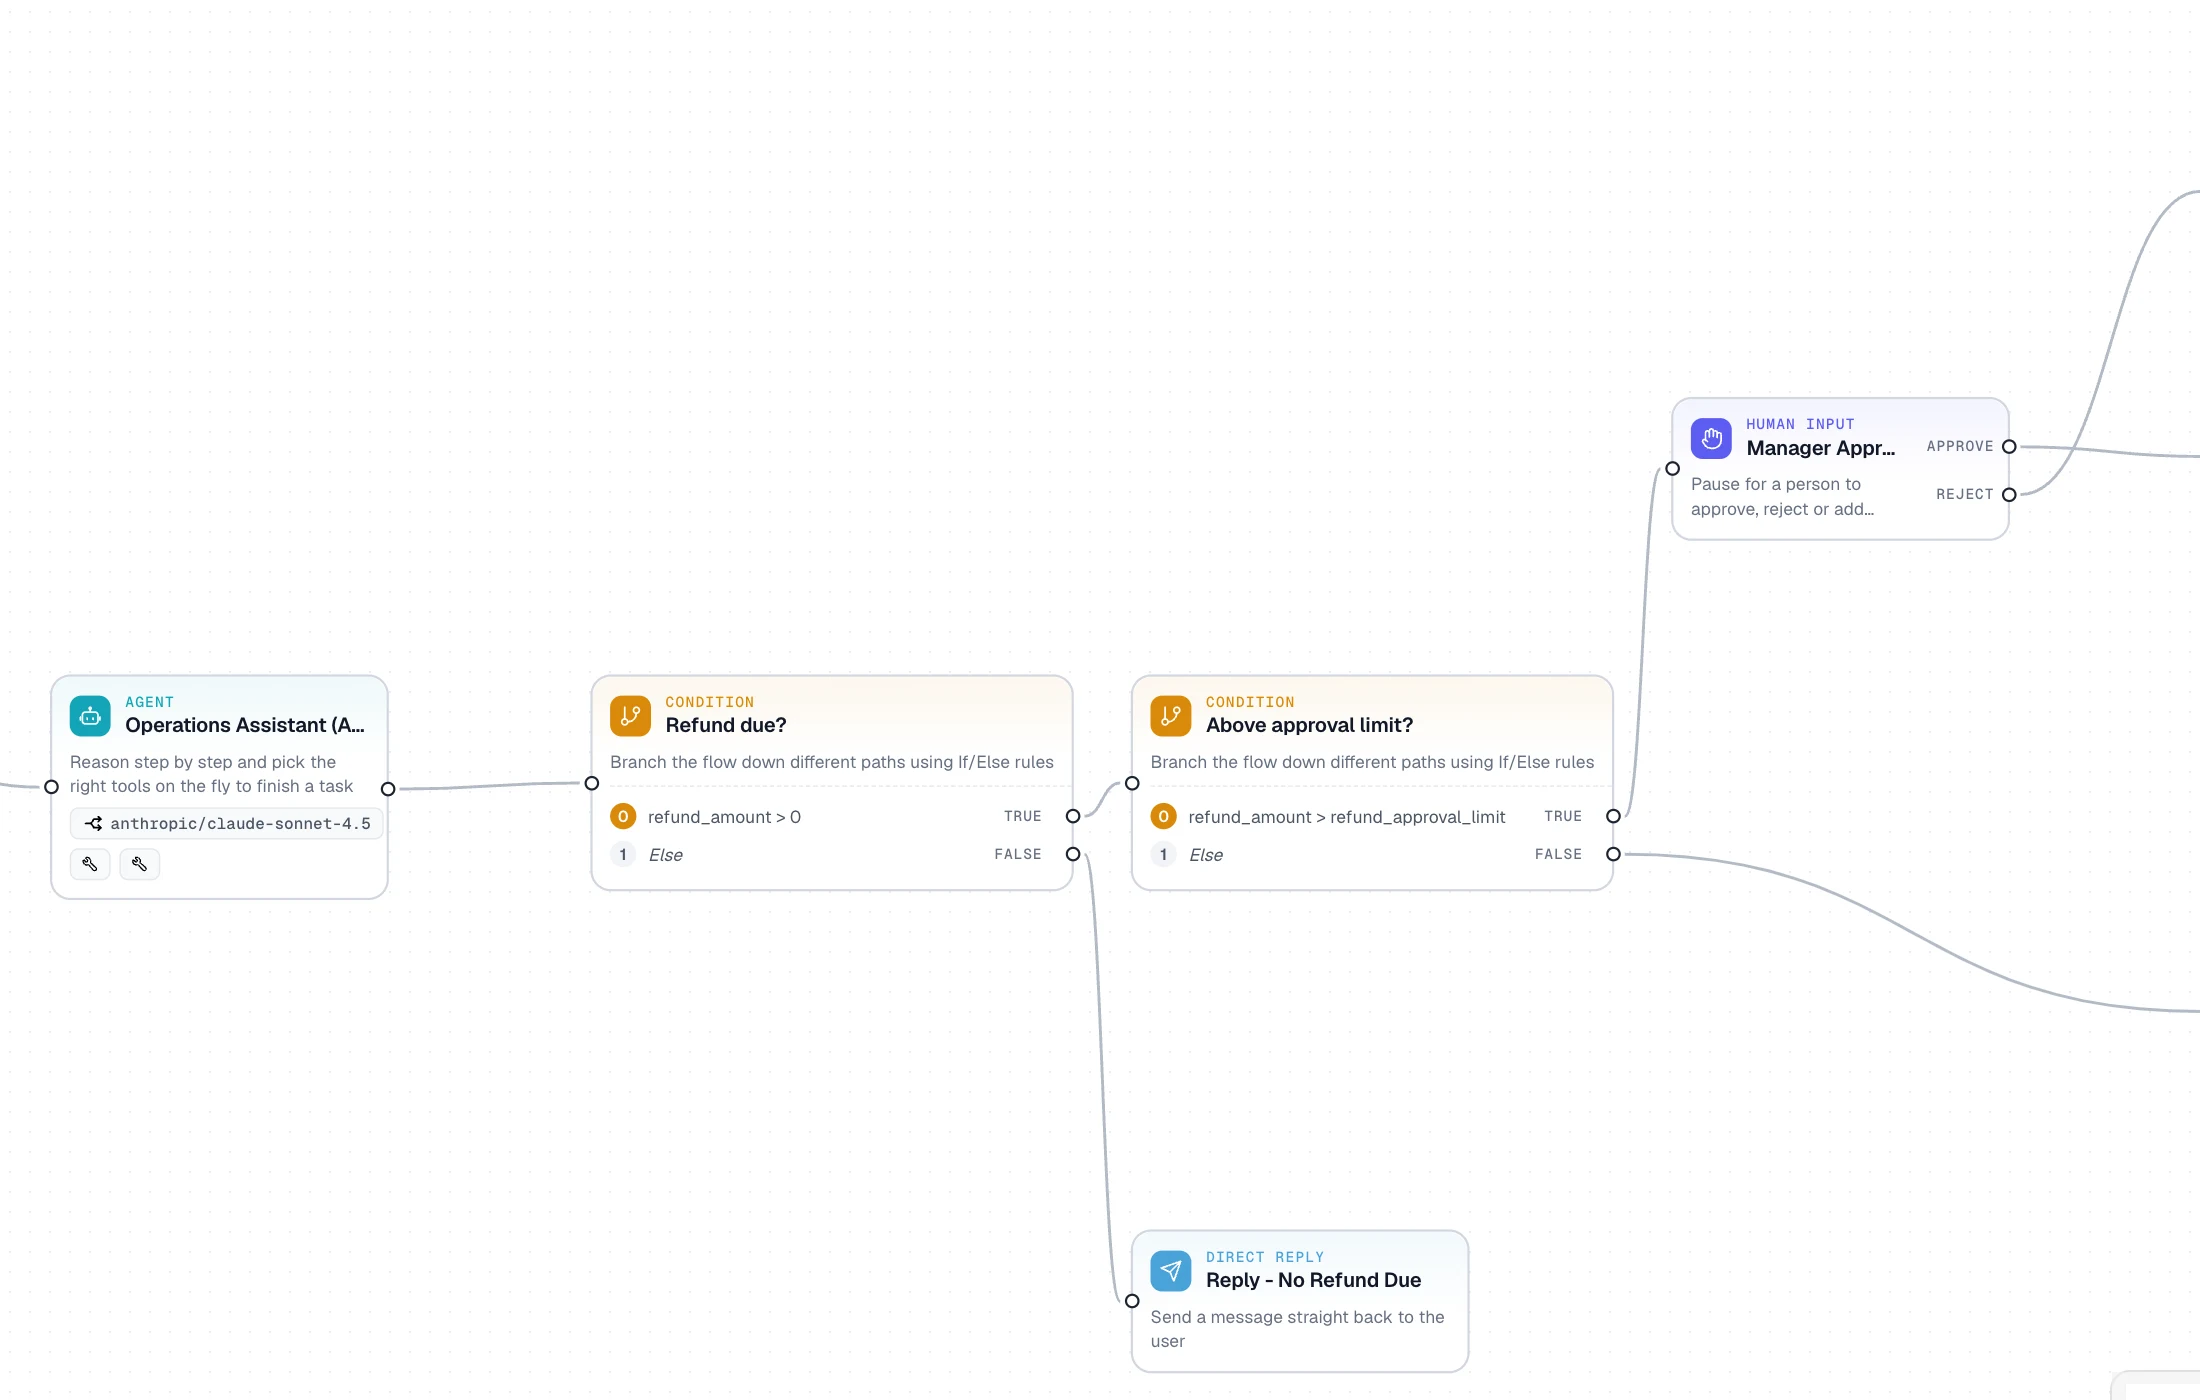
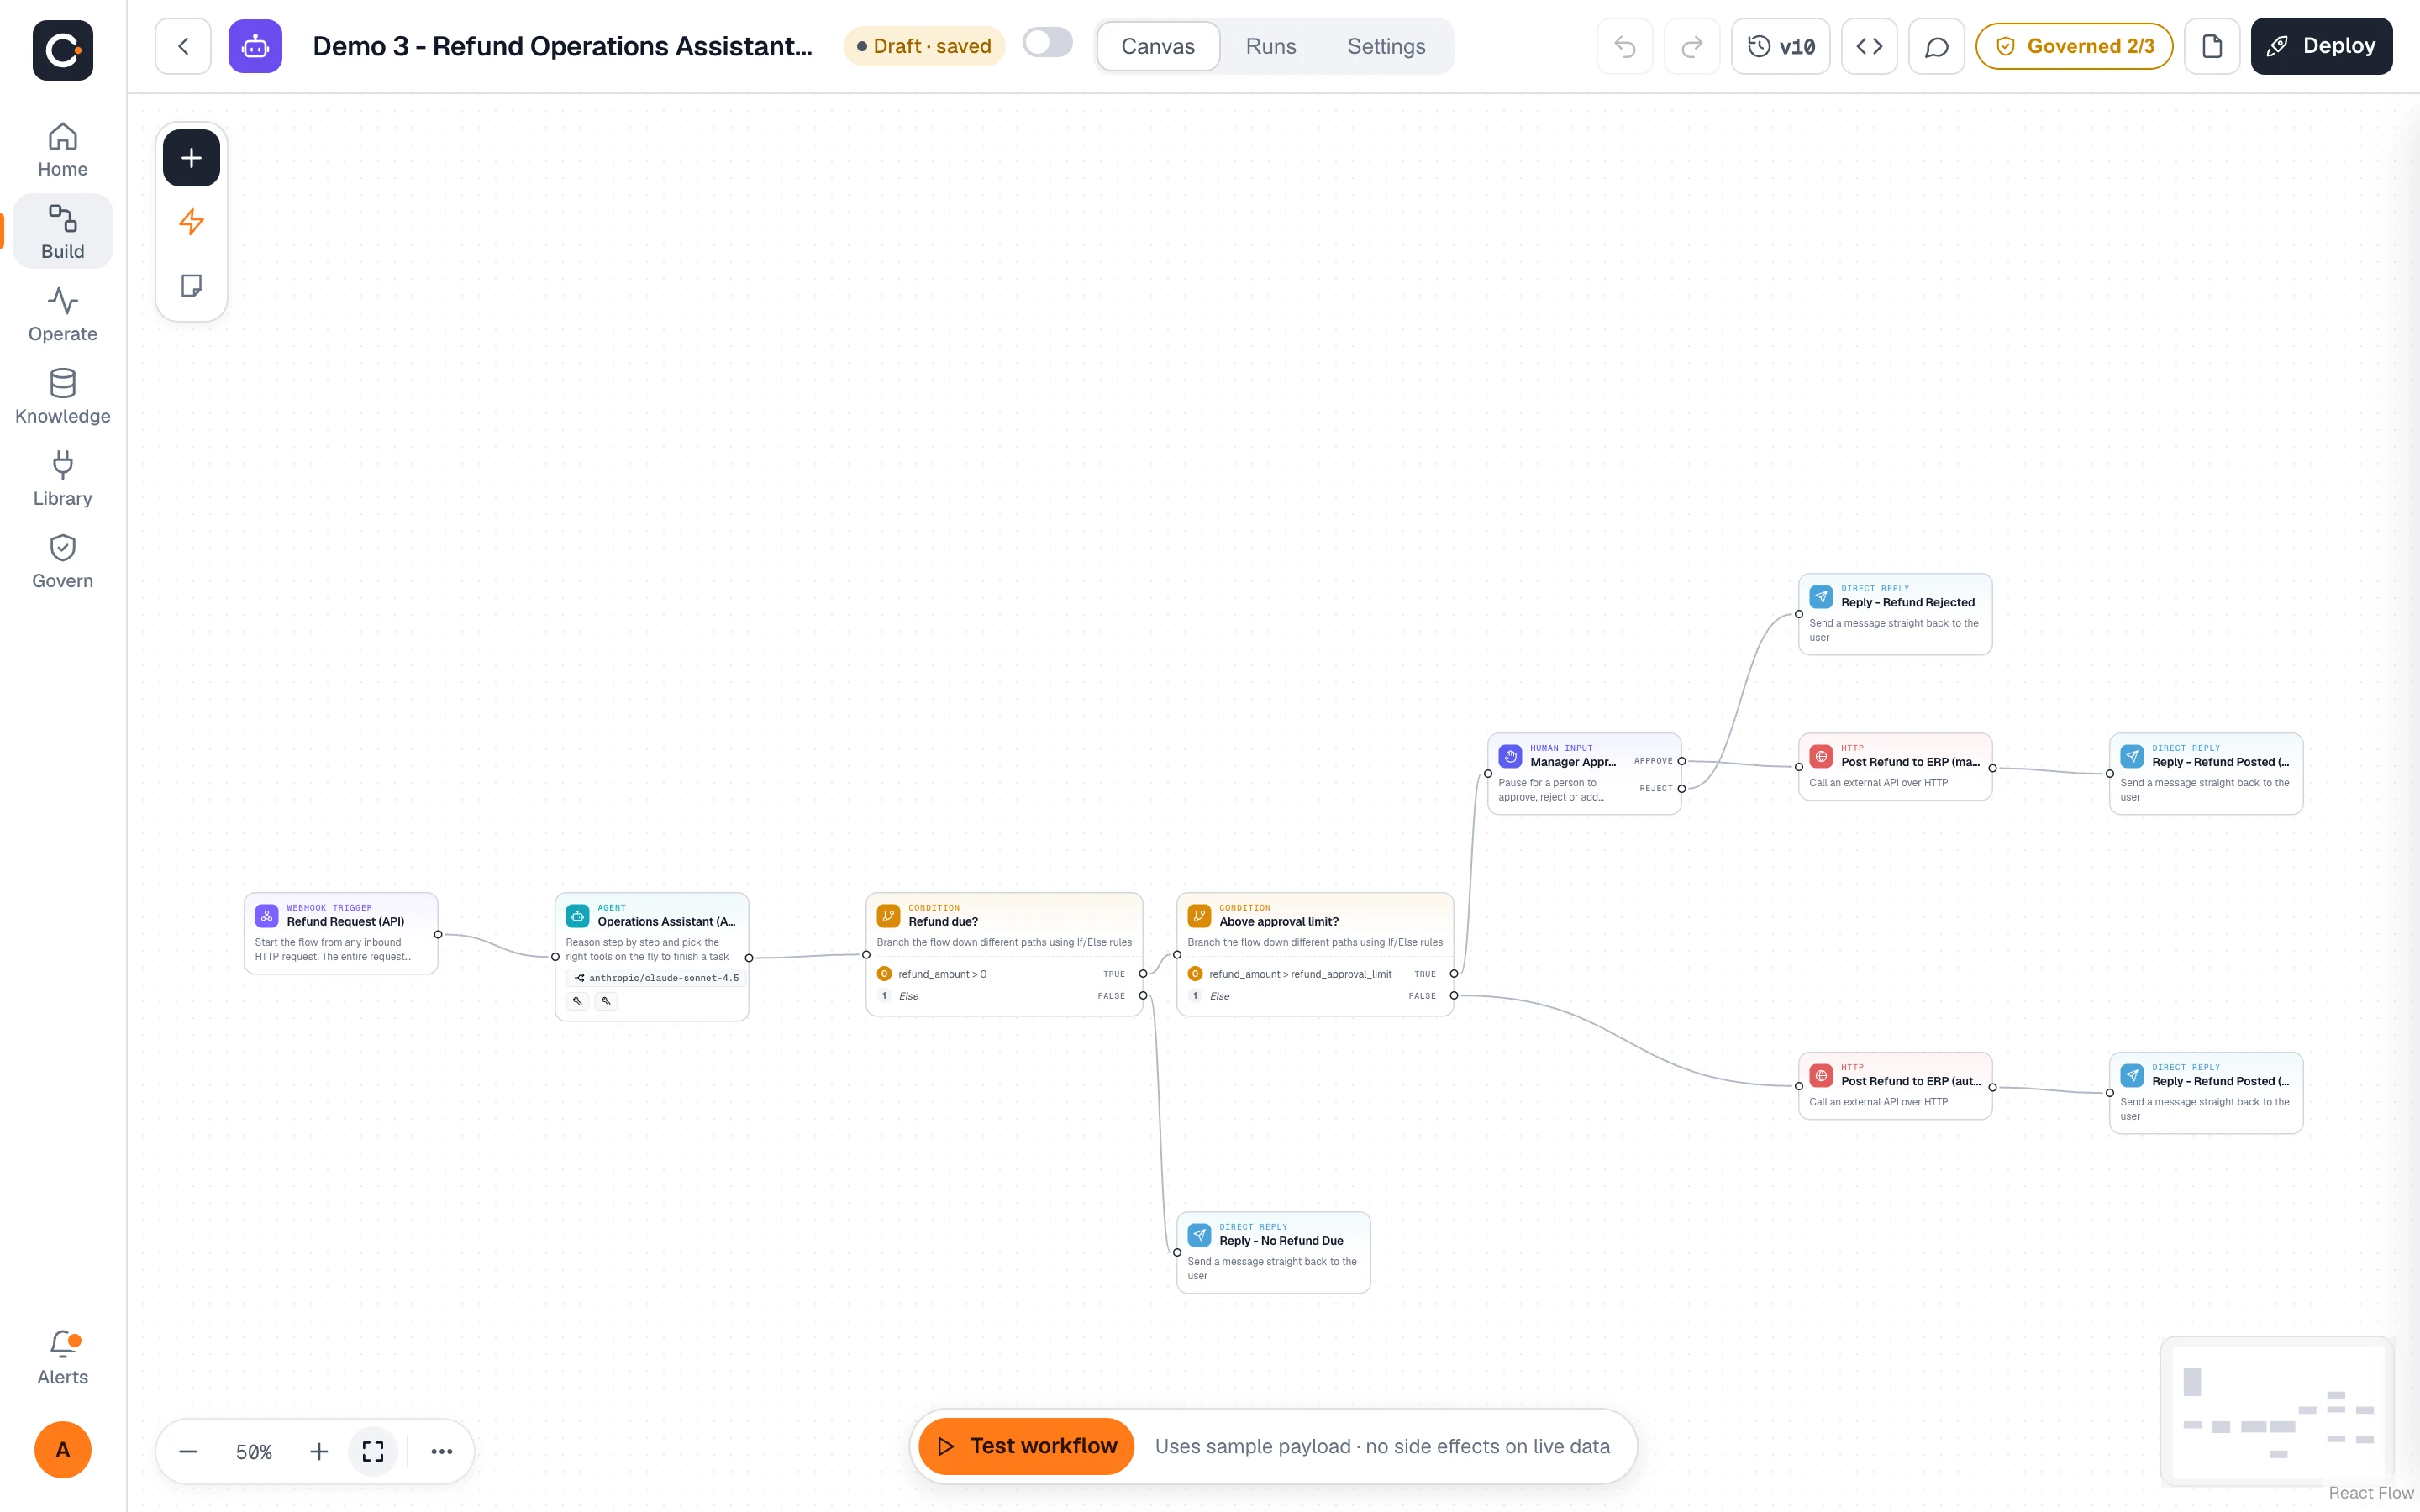
Drag agents, tools, conditions and approval steps onto one canvas and connect them. The result reads like a flow chart, so people who did not build it can still follow it.

  • Nodes for triggers, agents, conditions, loops and human input
  • Pick tools from the catalog or add your own
app.cadrixflow.com / build
Building a workflow on the Cadrix canvas
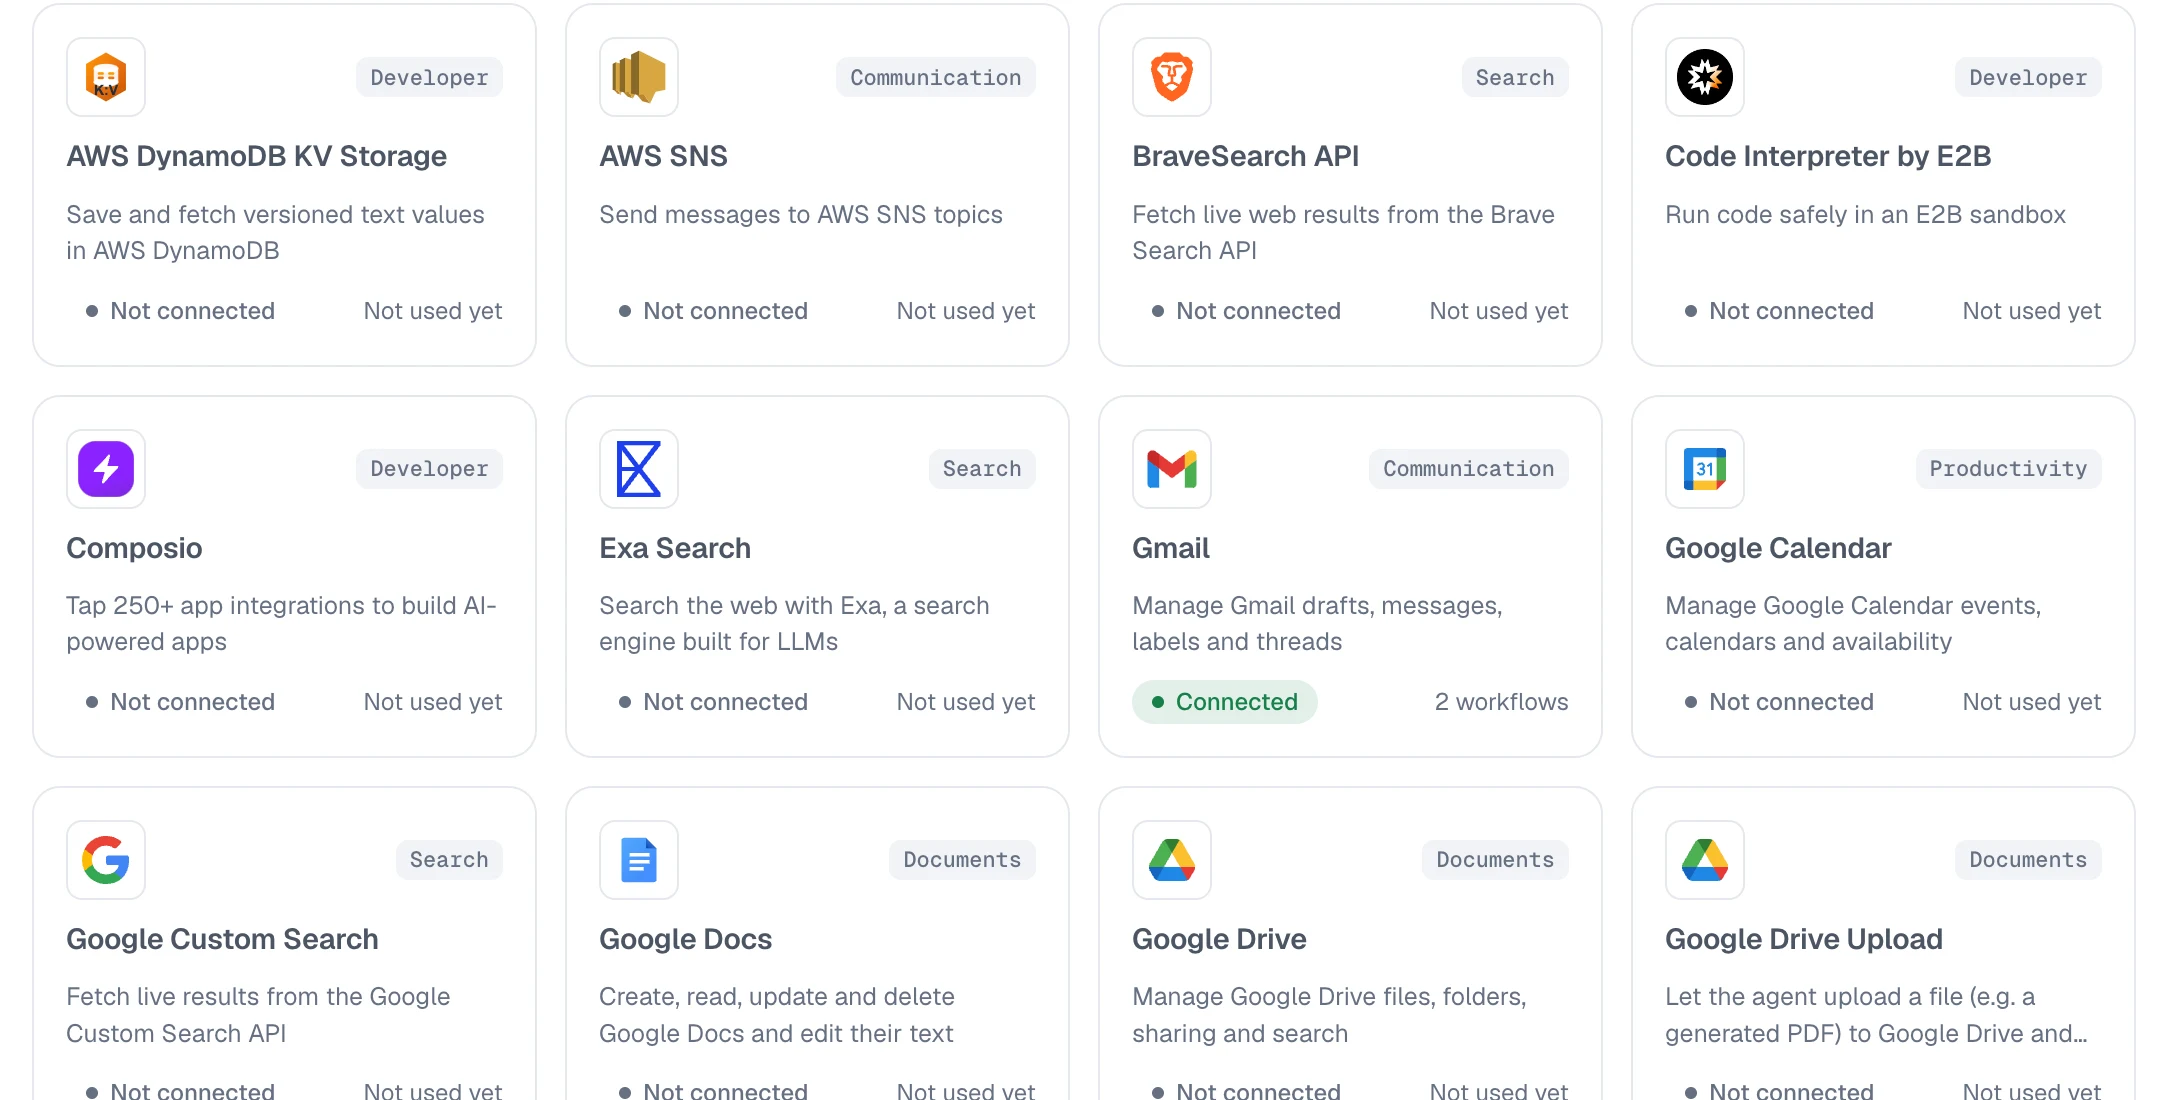
Close-up of the integrations catalog with connection status on each card
The tool catalog: connect what the workflow needs.

Step 2: Test it where you build it

Run the workflow from the editor with a sample payload before it touches anything live. The Test workflow button sits at the bottom of the canvas.

  • Try a normal case, an odd one and one it should refuse
  • Watch the run progress, then read what each step did
app.cadrixflow.com / canvas
The Cadrix canvas with the Test workflow button and the Deploy button visible

Step 3: Deploy and let your systems call it

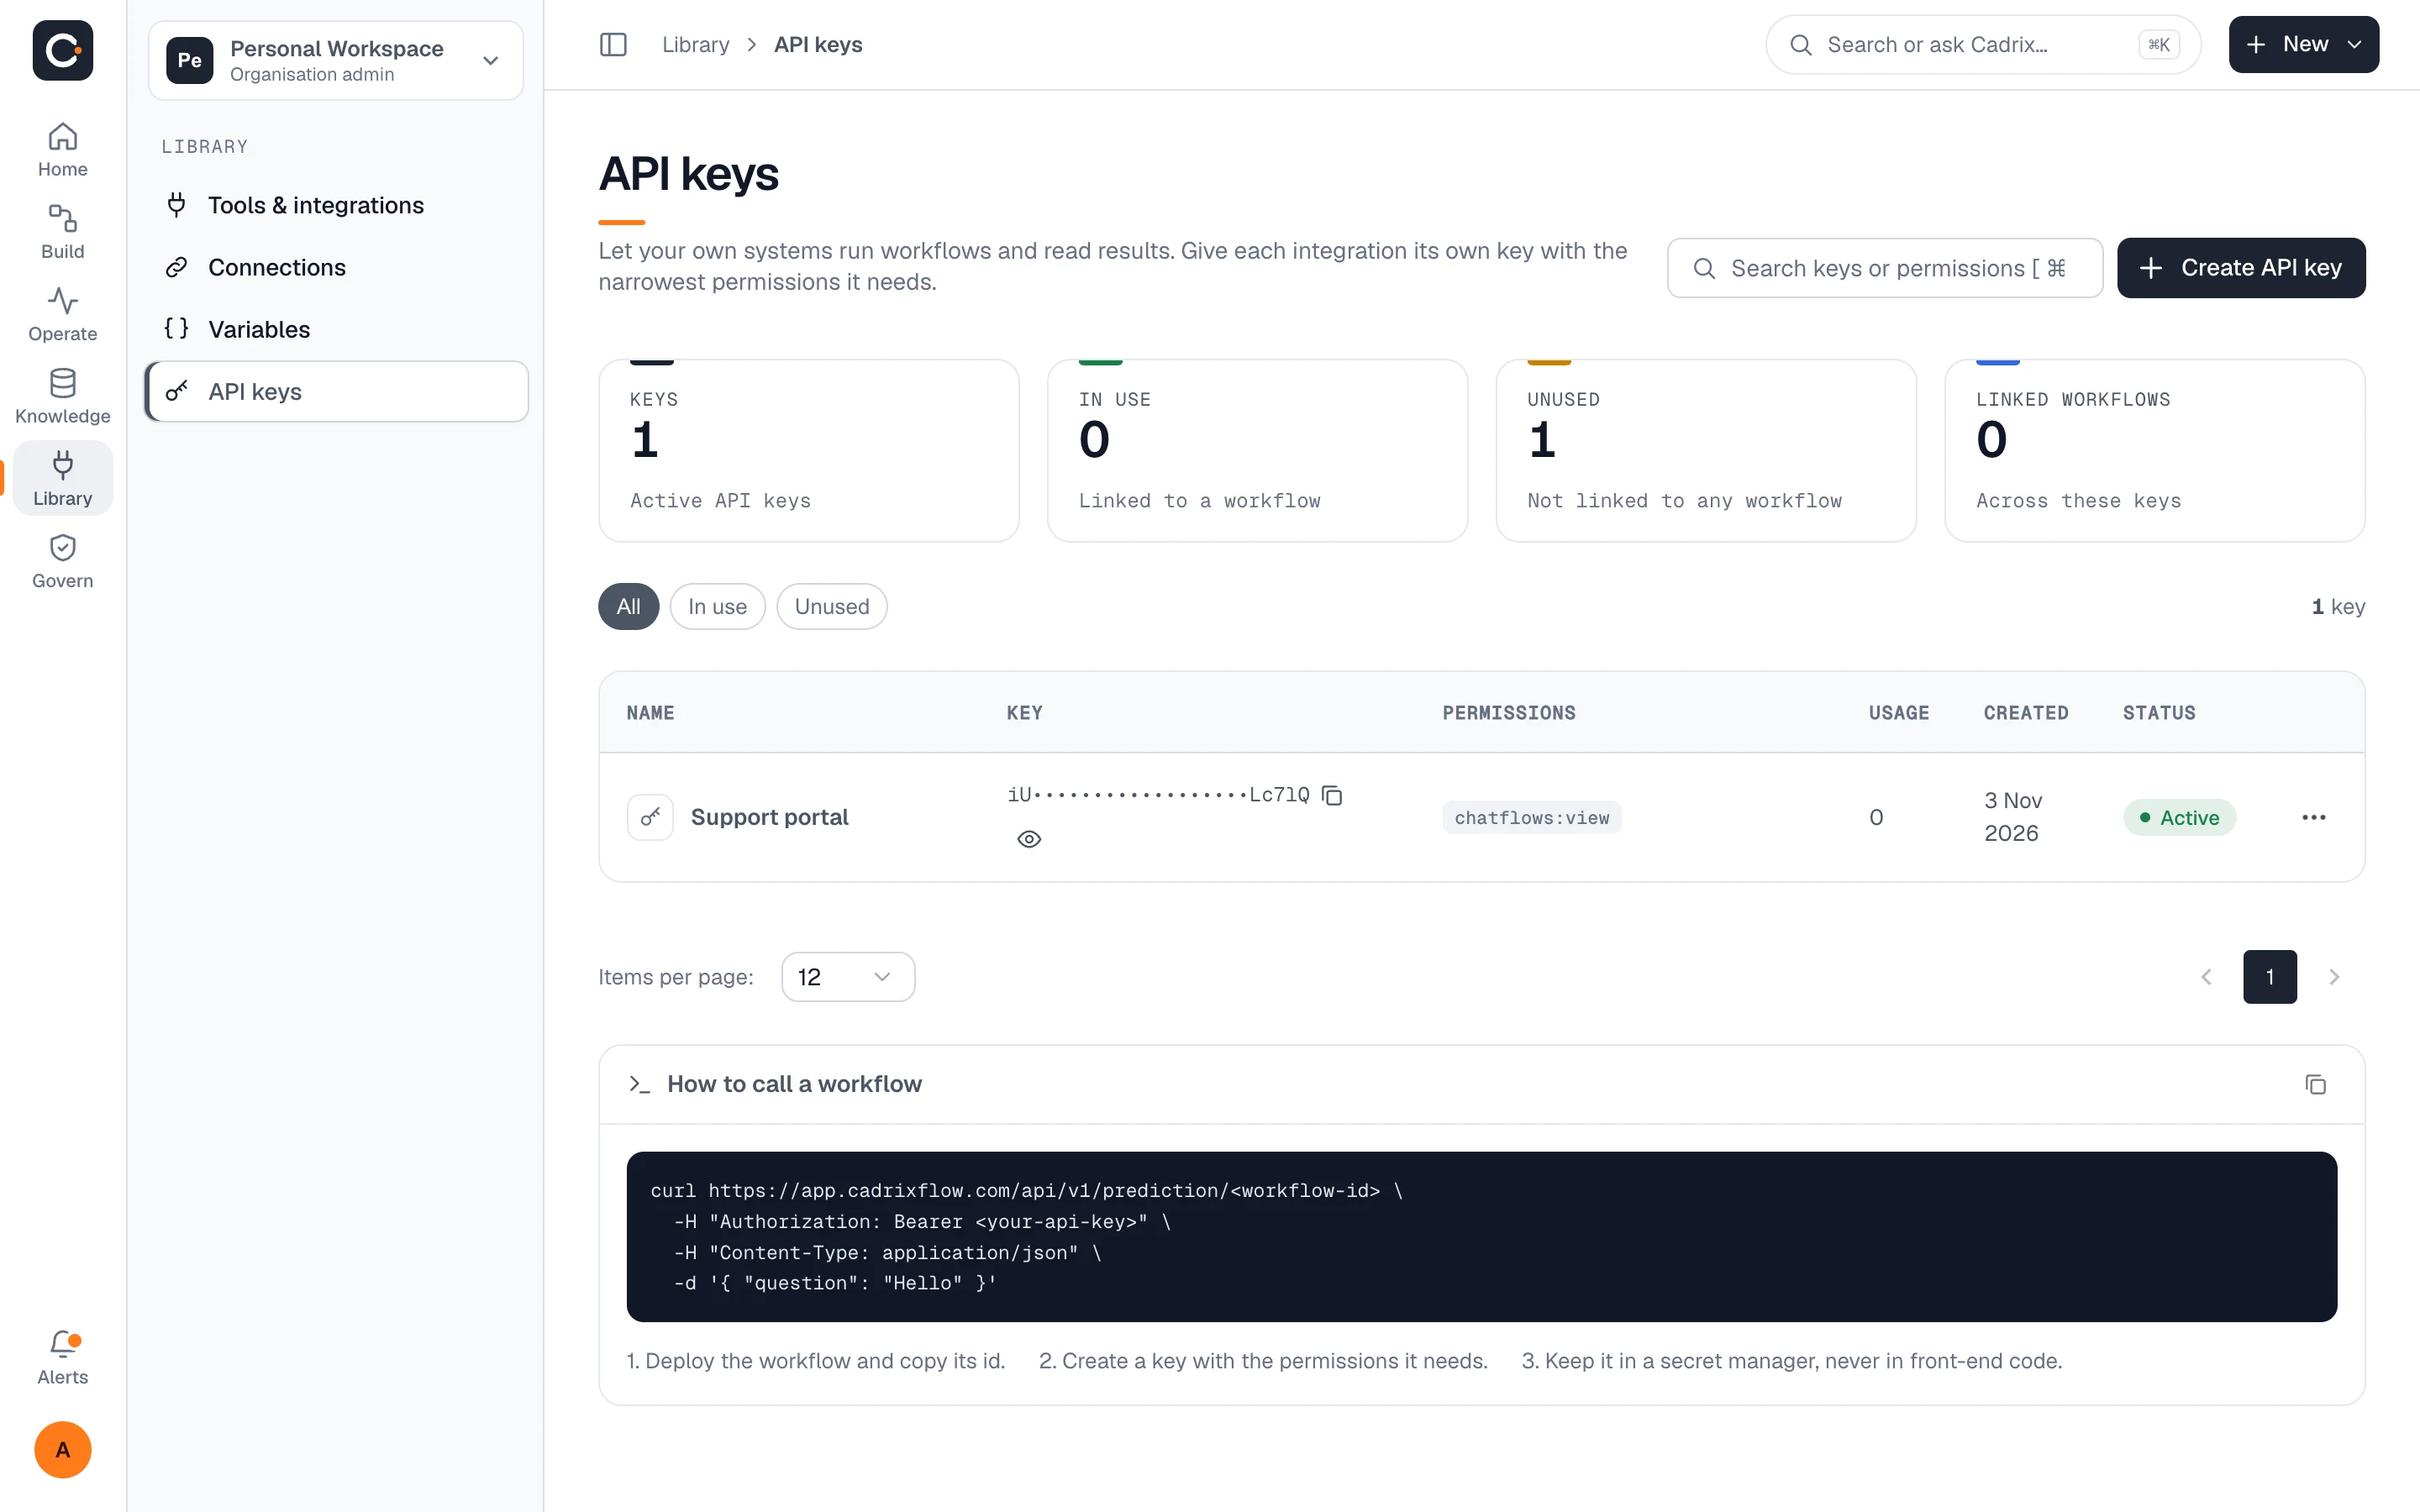
When the workflow behaves, deploy it. Your own applications can then run it over the API with a key that carries only the permissions it needs, or you can embed it in a website.

  • One key per integration, with narrow permissions
  • The keys page shows which workflows a key is linked to and whether it has been used
app.cadrixflow.com / api-keys
The API keys page with a scoped key and a snippet showing how to call a workflow

Step 4: Read the run trace

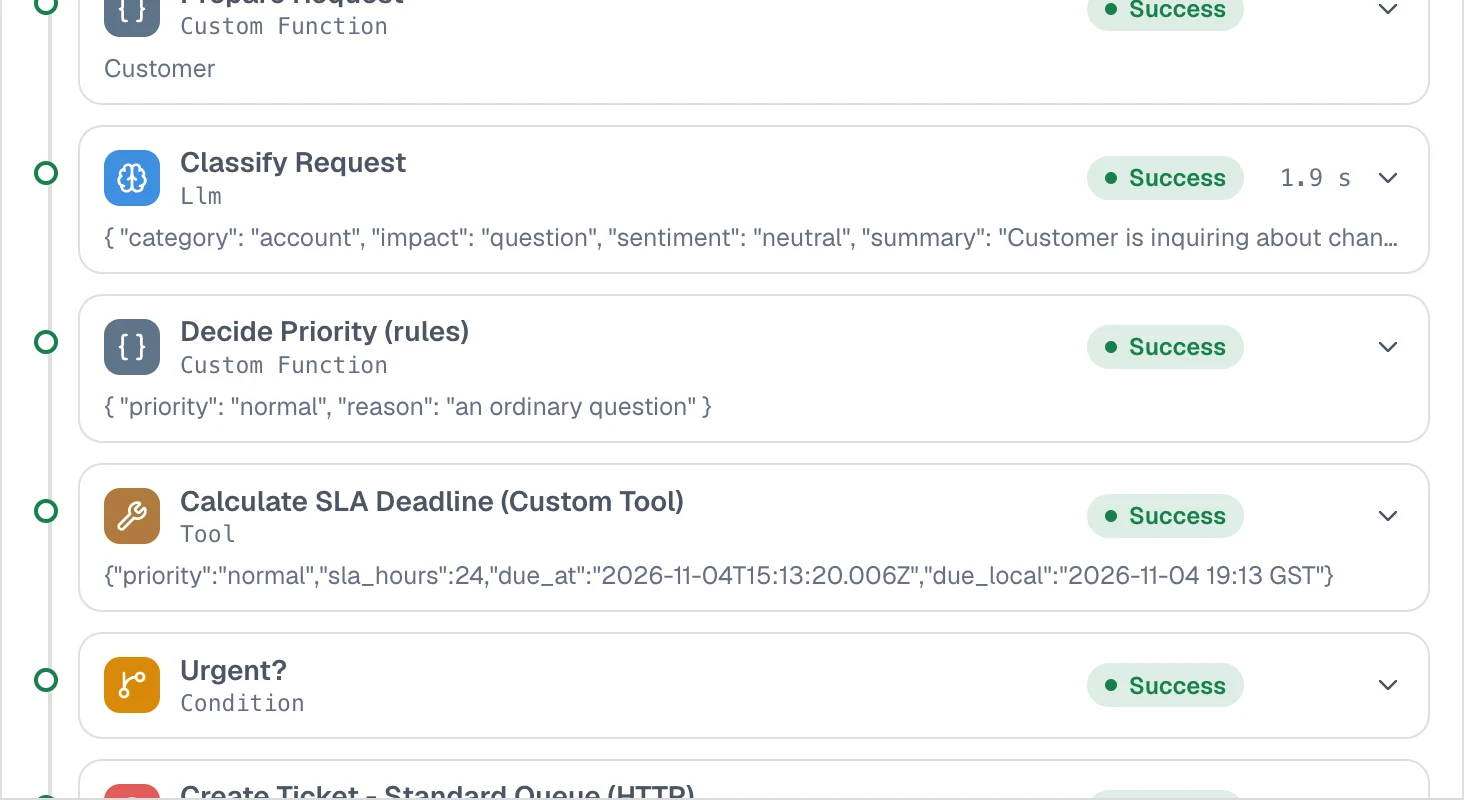
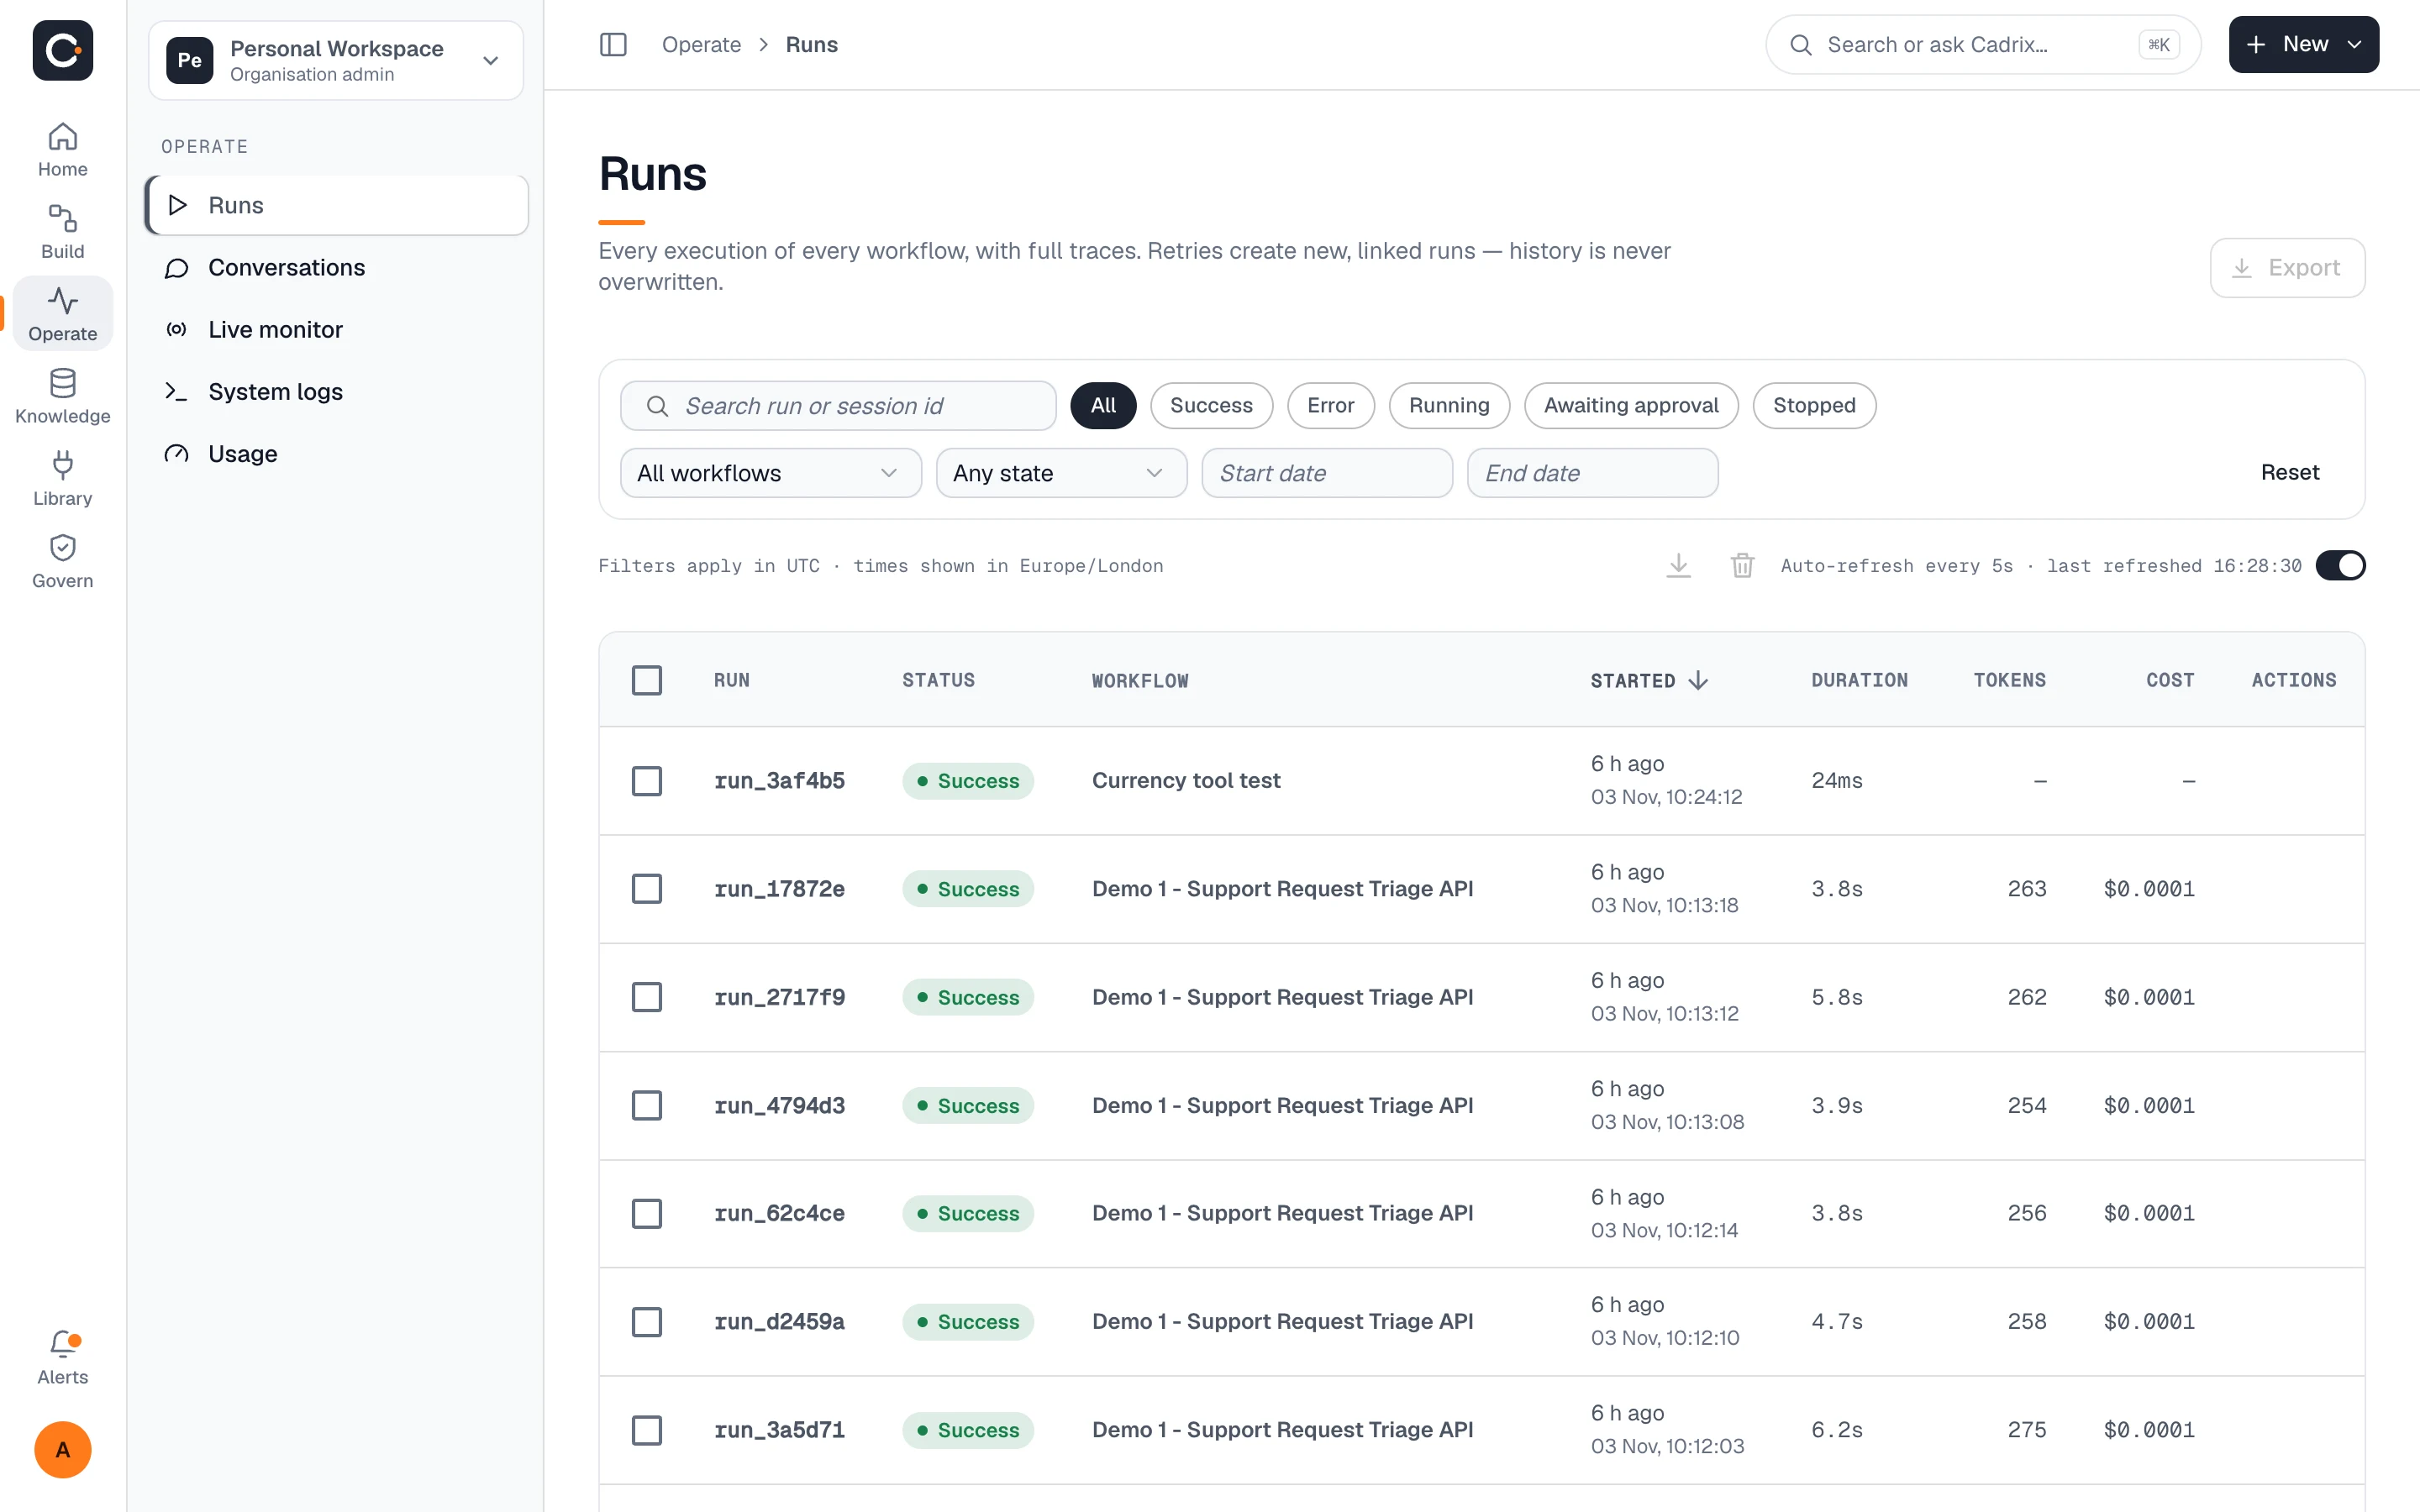
Every run is listed with its status, duration, tokens and cost. Open one to see what each step received and returned, and how long it took.

  • Retry a failed step or re-run with edits; the original run stays on record
  • The list refreshes on its own so you can watch runs as they happen
app.cadrixflow.com / run
Close-up of a run trace with per-step status, timing and output
The runs list with status, workflow, duration, tokens and cost for each execution
The runs list: status, duration, tokens and cost.

Step 5: Put a person in charge of the risky step

Add a Human Input step where a decision should not be automated. The run pauses, shows as Awaiting approval, and continues down the approve or reject path once a person decides.

  • Both outcomes are separate paths you design
  • Waiting runs appear in the Needs you queue on the home page
app.cadrixflow.com / canvas
Close-up of the canvas showing an agent, two conditions and a Human Input node with approve and reject outputs

Step 6: Decide who can do what

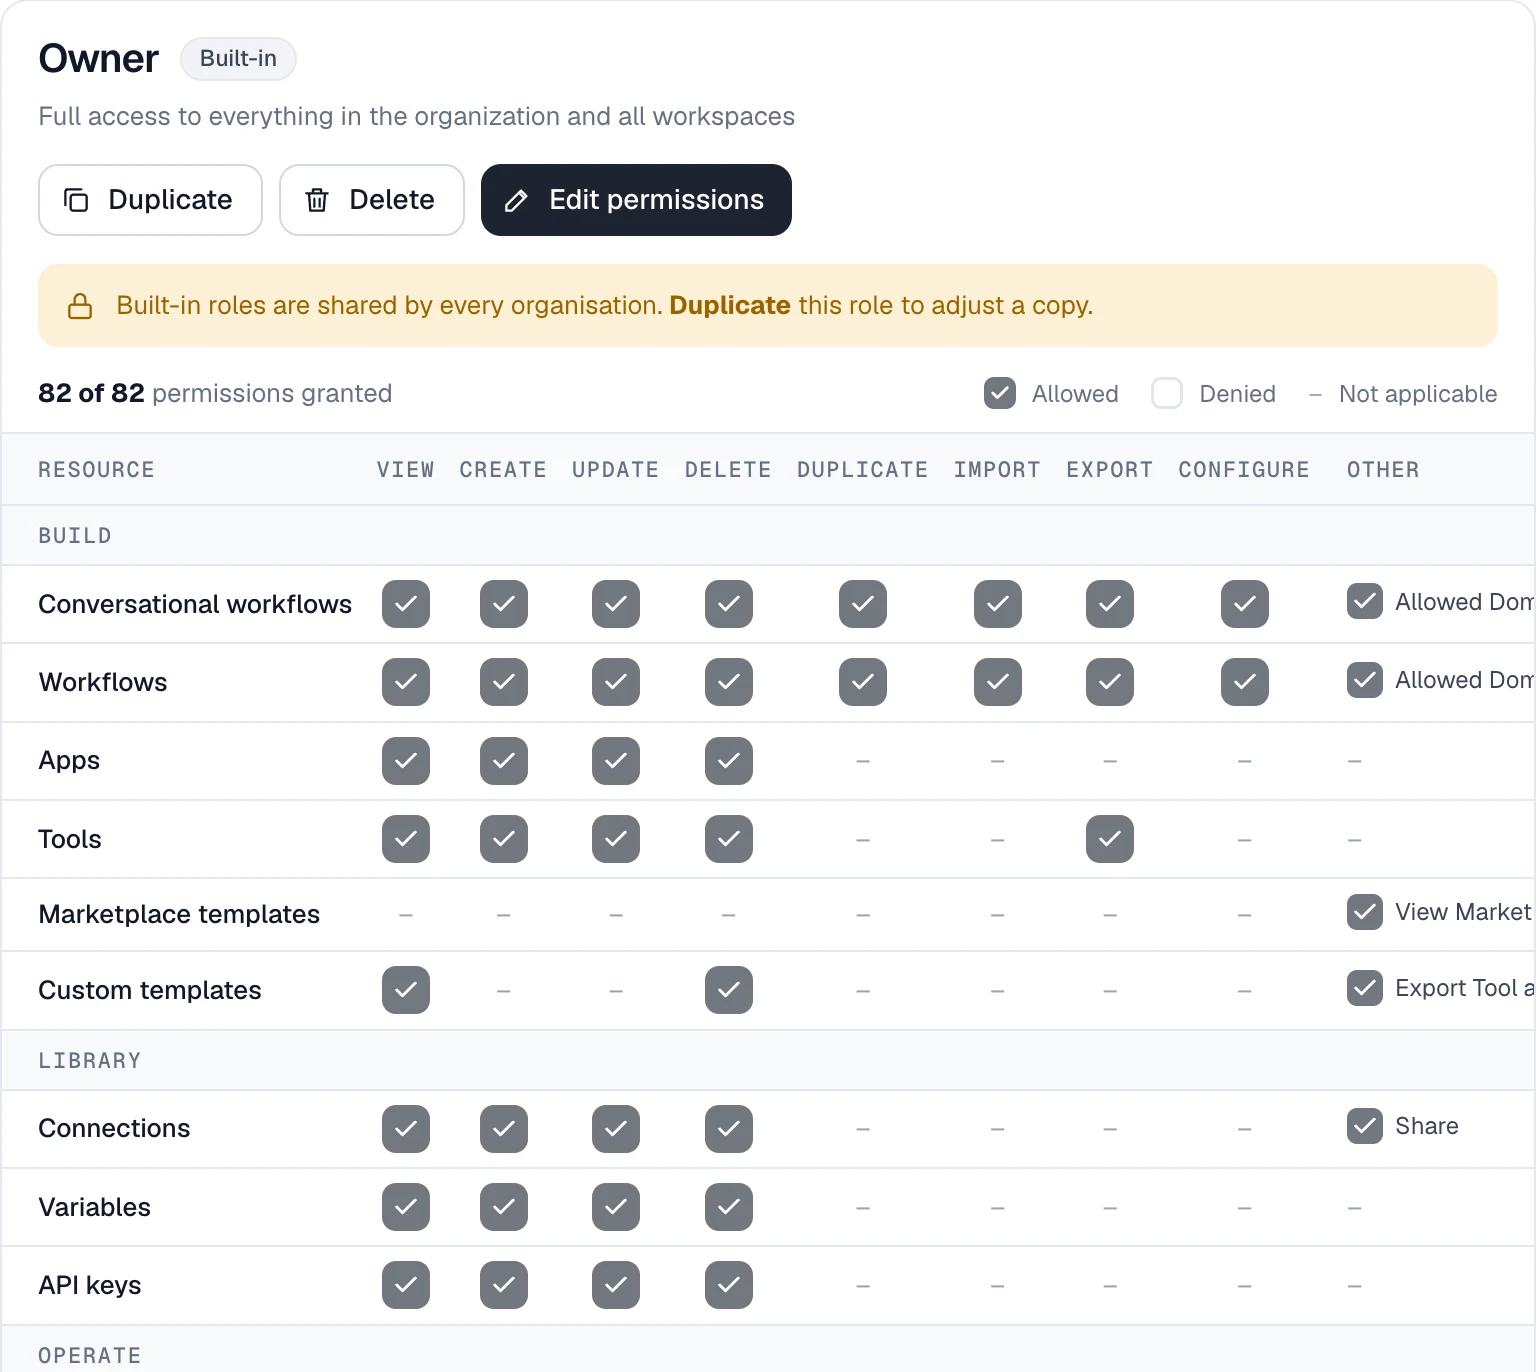
Roles set who can view, create, update, delete and configure each part of the product, enforced on the server. Separate teams with workspaces and keep an eye on usage.

  • Built-in roles on every plan; custom roles on Team and Enterprise
  • Quotas and usage limits keep spend visible
app.cadrixflow.com / roles
Close-up of the roles permission matrix with resources and actions

Try it yourself.

Start on the free plan and build your first workflow in the same canvas you just saw.